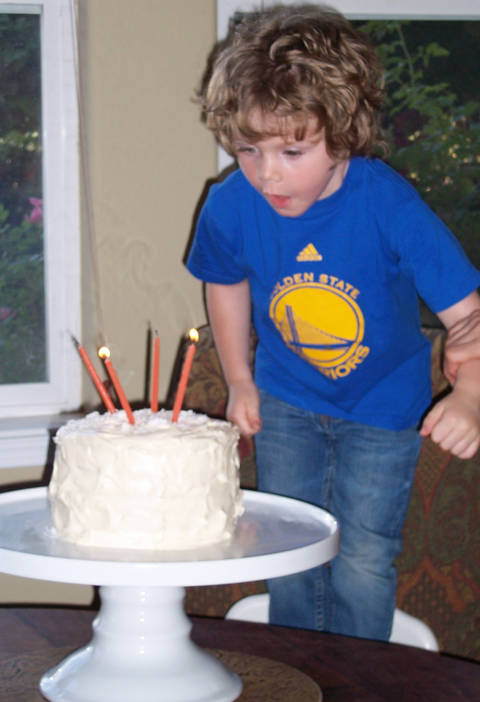
Hayden’s Coconut Cake
Tara's Notes
Ingredients
Coconut Filling (to be spread between layers)
Glaze (to be brushed on layers)
Cake
Frosting
Method
For coconut filling:
-
In a heavy saucepan or large Dutch oven, heat the cream, sugar and butter over medium-high heat, stirring frequently until the mixture reaches a boil. Stir in the 4 cups of defrosted coconut meat, stirring well. Cook until the mixture reduces to 5 cups, about 15 minutes, stirring constantly. Remove from heat and stir in the cornstarch. Place pan over high heat and bring to a boil, stirring constantly. Add the vanilla and cook and stir about one minute. Remove from heat and continue stirring a few seconds more. Cool slightly, cover with plastic wrap and refrigerate until very well chilled, or overnight.
For glaze:
-
Combine the coconut milk and the sugar in a two-quart saucepan and bring to a boil over high heat, stirring occasionally. Continue boiling until glaze reduces to one cup, about five minutes, stirring frequently. Remove from heat and stir in the vanilla. Pour into a glass measuring cup.
For cake:
-
Preheat the oven to 350°. Using room-temperature butter, grease and flour three 8 x 2-inch round cake pans. Line the inside bottom of each cake pan with circles of parchment paper.
-
In a medium-size bowl, sift together the flour, baking powder and salt. Set aside.
-
Pour the heavy cream into a two- to three-quart metal or glass bowl and put it into the freezer along with a medium-large whisk. Let them chill between 30 and 45 minutes.
-
In a large bowl of a stand mixer, combine the sugar and eggs; beat on low speed until smooth, about one minute, pushing sides down with a rubber spatula. Add the butter; beat on low until mixture is creamy and light colored, about three minutes. Beat in the milk and vanilla. Gradually add the flour mixture, about 1 cup at a time, beating after each addition just until smooth and pushing sides down as needed. Then beat on high speed for about one minute more, pushing sides down.
-
Remove the bowl of cream and the whisk from the freezer and whisk, by hand, until the cream has gone just past the soft-peak stage. Carefully fold the whipped cream into the cake batter, using a rubber spatula. Divide the batter evenly between the three cake pans and bake in the middle rack of the oven, until the centers spring back when lightly pressed (and the layers just begin to pull away from the pans), about 18 to 25 minutes.
-
Remove the cake pans from the oven and let cool for about 10 minutes. Then, using a knife, loosen the outsides of the cakes from the pans. Invert the pans onto wire racks and remove the pans. Cool for 15 minutes.
-
Once the layers have cooled for another 15 minutes, use a long, sharp knife or a layer cutter to slice each layer in half horizontally. Make holes in the cake so the glaze can sink in. (A dozen holes in each layer should do it; you can use either a small knife or a roasting fork, which you’ll twist a little after you insert it.) At this point place one layer on the cake plate you will use to serve the cake. Brush the glaze over the top surface and sides of one layer, a little at a time and using one-sixth of the glaze (about 2 1/2 tablespoons) for each layer. Immediately (before glazing another layer) spread one-fifth of the filling on top of the glazed layer, extending it to about 1/2 inch from the edge. Then place another layer on top and repeat procedure of glazing and spreading on filling until all the layers are glazed and all but the top layer have filling spread on them. Thoroughly chill the cake (it will make it easier to frost).
For frosting:
-
Combine the cream cheese, butter, vanilla and salt in the bowl of a stand mixer. Beat on high speed until creamy, about one minute. Turn speed to medium and beat in milk and 1 cup of the sugar, pushing sides down with a rubber spatula. Beat in the remaining 3 cups of sugar, 1 cup at a time, mixing until smooth before adding more. If the frosting becomes too thick for the mixer, do the last bit of mixing with a spoon.
Frosting cake:
-
Frost the top and sides. Sprinkle the remaining 2 tablespoons of minced coconut on top. Let sit at room temperature for between four hours and two days (so that the cake absorbs the sweet, moist coconut flavors) before slicing.
